Adding a New Room
Step 1: Access the Rooms Menu
Navigate to the Rooms section in the platform menu.
Click Add New Room to open the new room creation window.
Step 2: Enter Basic Room Details
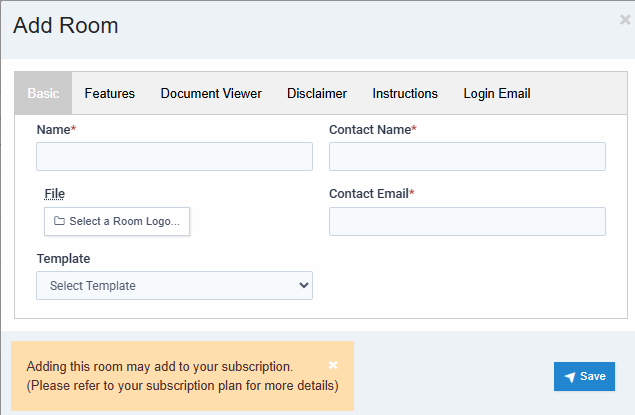
Fill in the essential details to define the room:
- Name: Enter the name of the room users will see
- Contact Name: Specify the name of the primary contact for this room.
- Contact Email: Provide the contact person's email address.
- Logo: Upload the logo associated room - This may be your company or a client's logo.
- Template option: We have several preconfigured templates, or you could create one during the pre-room configuration. See guide
https://guide.coollife.io/home/category/guide/section/1502/article/480 - Save
Step 3: Configure Room Features
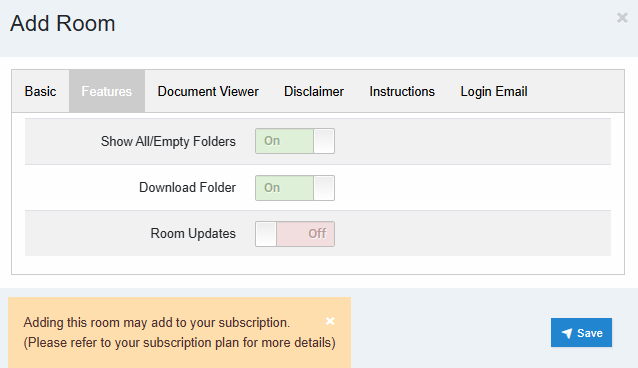
Customize the room settings to control file visibility and user access:
-
Show All/Empty Folders:
- Default: Off (Users only see folders containing files they can access).
- Turn on if users need to upload files into empty folders.
-
Download Folder:
- Determines if users can download an entire folder when they can download files.
-
Room Updates:
- Schedule email notifications for users about new or updated files.
- Options: Daily or Weekly.
Step 4: Adjust Document Viewer Permissions
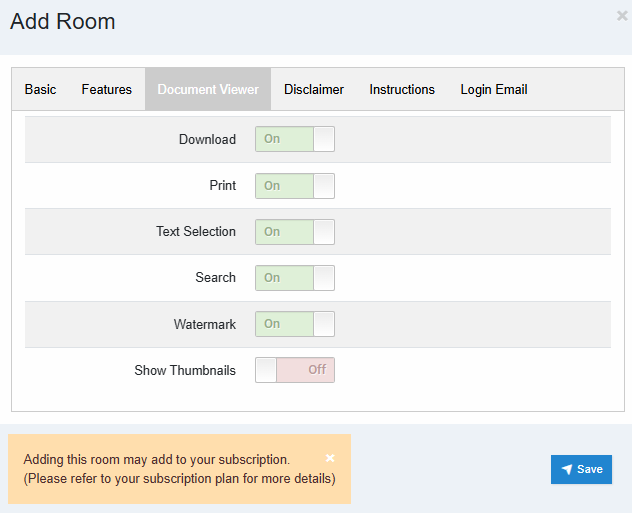
Control how users interact with documents inside the room:
- Download: Allow or restrict the ability to download files.
- Print: Allow or restrict the ability to print documents.
- Text Selection: Enable or disable text selection for copying and pasting.
- Watermark: Show or hide watermarks on files for added security.
- Show Thumbnails: Display or hide page thumbnails in the document viewer.
Step 5: Customize the Disclaimer (Optional)
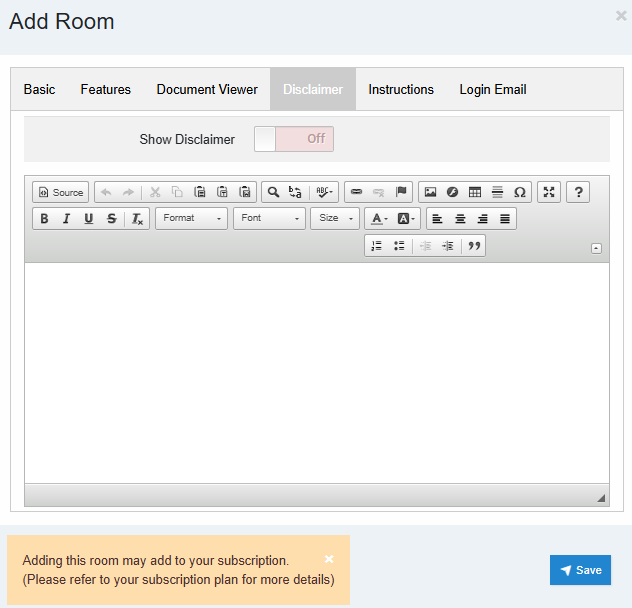
- Enter a custom disclaimer that users must acknowledge before accessing the data room.
- The suggestion is to use a custom invitation if you use a disclaimer. If a user fails to accept the disclaimer, they will be unable to use the files.
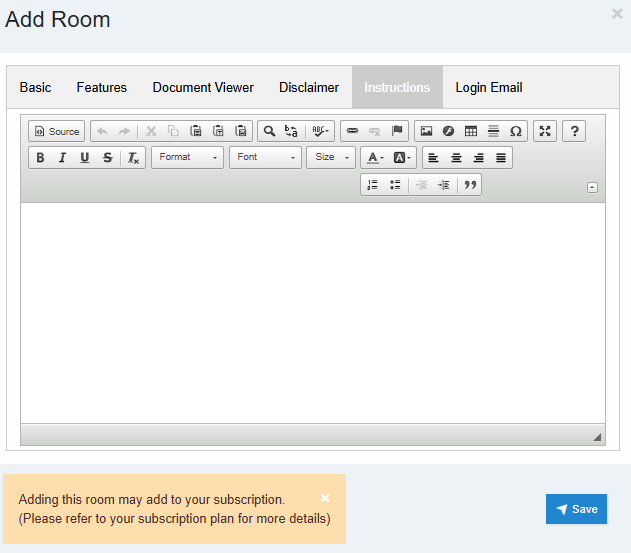
Step 6: Add Room Instructions (Optional)
- Provide custom instructions that users will see upon entering the room.
- Default message: A welcome to the data room notification.
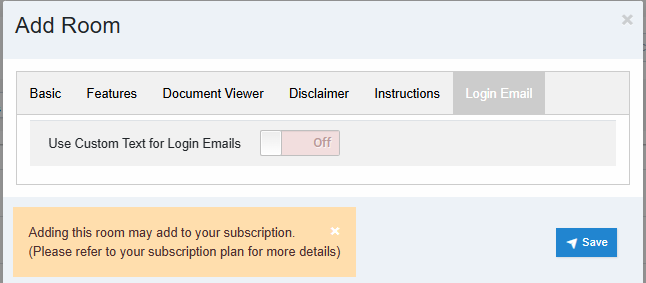
Step 7: Customize the Login Email (Optional)
- The system email provides all necessary information for your User to set credentials by default.
- Modify the login email template sent to invited users. (This will replace the generic message by not overriding necessary links for the user.
- Include relevant login details and any additional instructions.
Final Step: Save and Review
After configuring all settings, save the room and review its details to ensure it aligns with your security and access needs.
This structured setup ensures a seamless user experience while controlling document security and access permissions.
You may edit any option from the Rooms tab or while in your "Document" tab. There is a link at the top left for "Edit Room."


Articles in this section
- Adding a Folder
- Adding a New Room
- Adding Users
- Archiving Room (Admin Only)
- Branding
- Creating a Custom Login Email
- Creating External Upload Link
- Dark Mode
- Deactivated User Search
- Delete a Folder
- Deleting a file(s)
- Document Viewer
- Document Viewer Overrides
- Editing a Folder
- Editing File Settings
- Editing Your Profile
- Email All Users in Room
- Encrypted Files
- File Move/Copy
- Folder and File Naming Restriction's
- Folder Editing
- Folder Templates
- FTP - Support Related
- How to Clear Browser Cache
- Importing Multiple New Rooms
- Invitation in Bulk
- PDF Upload Best Practice
- Print & Download User Settings
- Professional email address
- Removing Encryption from a PDF
- Reports Data Rooms
- Resetting Your Password
- Security Levels and Security Sections
- Support - Requesting assistance
- Uploading Files
- User Search
- Viewing Folders and Files
- Watermarking
- Zip Upload